|
|
How to Remove Links in a Watch Strap Metal Bracelet
Adjusting the length of your metal bracelet watch strap is a fairly long process, but will not be too complicated with the aid of
these instructions. Most metal bracelet watch straps are held together by removeable pins that are secured by a central metal
ferrule. Before we start, there are a few things that you will need for this:
• A thin, pointy object like a bradawl or a drift. The
spring-bar removal tool has an ideal tool on one end.
• Long-nosed pliers
• A vice and small material to cushion the bracelet to avoid damage
• (Maybe) a small craft hammer
Before you do anything to your watch strap bracelet, you need to know how many links you are going to take out. It is best to take
out an even number, because then you can remove one from either side and ensure that the clip is still located in the centre of the
watch strap. Once you know how many links you are going to take out, you need to prepare your working area.
Ensure that your work area is free from clutter. It is also probably a good idea to put down a sheet or some other covering onto
the floor to make sure that any bits that fly off won't get lost.
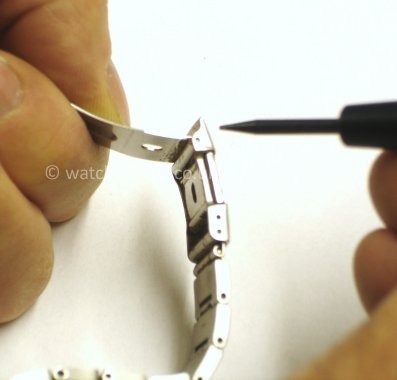
Firstly, it is necessary to separate the bracelet to remove the links. Remove the spring bar from the watch strap clasp so that
the bracelet is separated (to identify which spring bar it is, hold the clasp in your left hand, and it will be the one on the left
side). Use the bradawl or spring bar removing tool to compress the spring bar and lever it out of the clasp.
Be careful that it doesn't spring across the room, because this is the only one you have! You will notice that there are two sets
of holes, which will allow you to later on make an adjustment to the bracelet length if necessary.

Now we are ready to remove a link. Choose which link you are going to take out, and use the bradawl or spring bar removing tool to
push the pin that secures that particular link, following the direction of the printed arrows on the underside of the metal link.
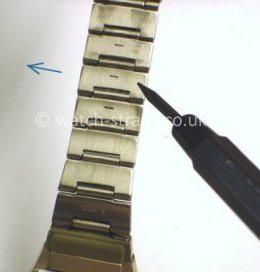
You should be able to push the pin 2 or 3mm and then pull it out from the other side using your pair of pliers or
by hand.
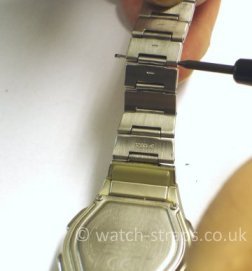
When it is completely
removed, depending on the bracelet type, a small metal ferrule that was in the middle of the joining link may be released. This ferrule will probably fall out onto the floor
or your workbench, so keep an eye on it! You will need this later, so keep it safe. Now you can repeat the process on the link's
other pin. When you have finished, you should have two pins and possibly two ferrules ready to use later.

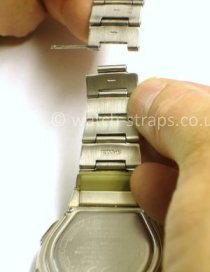
If you need to, repeat the process and remove another link on the other side of the clasp. When you have removed as many links as
you need to, we are ready to join the bracelet back together. Place the ferrule, if there is one, in the middle of the link that you are joining up,
and, this time working against the direction of the printed arrow, push the pin back into the hole, engaging the ferrule. If you need
to, you can gently tap the pin back into place using your small craft hammer.

To reconnect the clasp, you need to do the reverse of the disconnecting process, ensuring that it is the right way round and
replacing the spring bars.

Try on the bracelet. If it is a little loose or a little tight, it may be possible to further adjust
the bracelet by inserting the clasp's spring bars into an alternative set of holes to adjust the size.
You will have some spare parts, including the removed links, pins and ferrules. It is recommended that these are kept safe should
you need to use them again in the future.

|
|
